Introducing new 3D laser scanning tech solutions helps reduce costs and periods of refitting. It also proves beneficial in repair and conversion projects as from Aveva shows
The need for improved processes
The recent boom in shipbuilding has reduced the average age of the world[ds_preview] fleet, which continues to grow despite the downturn. This is building up a future boom in demand on the world’s ship repair, conversion and refit facilities. Although this may appear to be good news for the repair yards, ship owners are likely to see ever increasing day rates of using these facilities. They will therefore favour those repair yards whose speed and efficiency can minimise dry dock and out-of-service times.
The challenge for ship repair yards is therefore to increase their speed and productivity. Newbuilding projects already benefit considerably from the use of 3D design technologies and the many productivity gains that these enable throughout the shipbuilding process, but ship repair by comparison remains labour intensive and little automated. However, the production facilities and skills required are substantially the same for both newbuilding and repair projects, so 3D potentially offers valuable improvements in ship repair productivity. If one could capture the »as is« vessel into the 3D design environment quickly, accurately and economically, the levels of productivity on newbuilds could be approached on repair projects, with considerable benefits to both shipyard and customer.
Capturing »as is« information
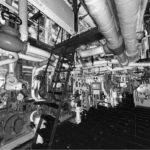
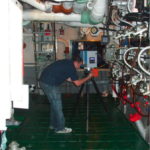
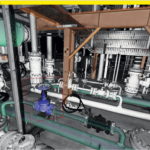
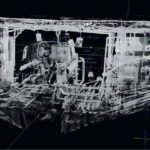
Vessel outfitting involves arranging large amounts of equipment in limited spaces so, whether placing new equipment in an existing space or stripping and refurbishing an entire vessel, the starting point is always the »as is« condition of the vessel. Even if the original 3D data model used to build the ship is still available it is unlikely to accurately represent its »as is« arrangement. You have to go on board and survey it. Historically, surveying has been costly, time consuming and of limited accuracy. It also could not usually take place until the ship is in the repair dock, adding to the duration of the project and the commercial risk that the project may be more difficult than was estimated. Fortunately, these difficulties can now be avoided through the use of 3D laser scanning technology, offering real potential to improve design accuracy and project efficiency. Scanning systems are inexpensive to use, non-invasive, and deliver levels of detail and accuracy unachievable by conventional means. In use, a laser scanner generates a so-called »point cloud« of 3D coordinates that forms an extremely accurate and photo-realistic 3D rendering of the objects within its 360° field of view. The accuracy of such a survey is typically within a millimetre or so over distances of several metres; more than adequate for the most detailed refit. The scanning process is repeated from several locations and the resulting point clouds stitched together. This creates a comprehensive 3D survey, combining views of objects from different directions and overcoming the masking of objects by foreground objects in any individual view.
The laser scanner also measures the intensity of the reflected beam and can distinguish between surfaces with different levels of reflectivity caused by colour or surface texture. These are typically shown in the point cloud using different levels of grey. This is usually sufficient for engineering design purposes but, using a special camera in the scanner, points in the point cloud can even be assigned the correct colour. In this way, the massive amount of data generated by the laser scanner becomes easy to visualise and use. Because laser scanning is so quick and non-invasive it can take place before the ship arrives at the repair yard, typically by a subcontracted laser-surveying company while the ship is in harbour. Once the scan data have been processed, the »as is« information enables the repair yard’s planners and designers to prepare accurate estimates of the work required, and even to begin design, materials procurement and fabrication work in advance of the vessel’s arrival.
Combining reality and design
Modern shipbuilding design solutions such as Aveva Marine allow point clouds created by any of the leading laser scanning devices to be directly referenced within the 3D modelling application. Not only can measurements be made and drawings created using the same software that is used for new-build projects, but the new design objects can be created and positioned accurately against the »as is« laser models. For example, 3D models of new equipment items and their associated pipe and cable routes through an engine room can be created within an accurate 3D representation of the existing structure and equipment in that room. Not only is it possible to visually check the position and accessibility of the new items, the software’s clash detection functions detect any intersections of the new 3D models with the laser scanned model; for example, where a newly modelled pipe is being routed among existing pipes or bulkheads.
Such accuracy and the confidence it creates enables new steel structure, pipes, ventilation or cable ways to be designed and fabricated ready for the vessel’s arrival. Refit work can begin immediately and be carried out quickly, with little or no rework required, because the new items will have been accurately checked against the »as is« vessel.
Reverse engineering
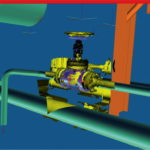
The most basic form of reverse engineering is to measure an existing item and then re-create it to the same dimensions in the 3D modelling application. By clicking on 3D points in a point cloud, simple geometries such as cylinders, spheres, cones and rectangular prisms can easily be created in the scan data models. These geometrical volumes then overlay and replace similar shapes described by the point cloud. Within the shipbuilding design system these geometries can be used to define equipment items, pipelines, or other components. For example, a new pipeline can be created in exactly the position of an existing pipeline represented in the point cloud. However, although a big improvement on traditional methods, this is still a time-consuming process.
Laser scanner manufacturers have therefore for some time been working on improved methods to automatically create native 3D model objects from the corresponding shapes in the laser model. Among the leading applications that achieve this is Aveva Laser Modeller, which is the result of close collaboration between Aveva and LFM, the former software division of Z+F UK Ltd (now part of Aveva). Aveva Laser Modeller enables any pipes or simple structural elements captured in the point cloud to be identified and, by comparison with pre-defined specifications, interactively converted into intelligent 3D model objects with associated attributes. For example, by first selecting the appropriate pipe specification and then selecting just two points on each straight-line segment of a pipe run, Laser Modeller is able to recreate the 3D position and geometry of the pipe, even if it is hidden underneath insulation or passes through shadows in the point cloud. By then adding details of bend types and radii, the pipe run is created as a 3D model which replaces the corresponding data in the point cloud. As well as pipes, scanned structural steel items, such as angle bar, T- or H-beams, can also be modelled by first specifying the type of item represented (e.g. L200x10) and then selecting just a few points, one on each scanned surface. Similarly, Aveva Laser Modeller can create simple surfaces. The selection of a few points anywhere on a scanned surface is sufficient to create, for example, a 3D surface model of the cylindrical body of a pressure vessel. Other types of surfaces, including conical and spherical, are created similarly.
Creating design data in Aveva Marine
The creation of a 3D surface or a 3D model of a pipe or structure is only the first step in full reverse engineering. To complete or modify the design, the design intent must next be transferred to a system such as Aveva Outfitting. Now the designer can complete the design by integrating existing and new objects, running collision detections, and creating drawings and other production deliverables.
Hull surface and structure
Hull surfaces and hull structure are of course easily captured by laser scanning, but converting such scans into usable design information is more difficult and is not currently achieved. The reason for this limitation is that advanced 3D hull structure modelling tools such as Aveva Marine deal with far more than just surface geometry; they create design intent. The design intent is represented by, among other things, the topological relationships between parts, design rules for the automatic creation of details such end cuts and brackets, and rules for calculating weld shrinkage compensation. For these reasons Aveva Laser Modeller is not used for reverse engineering of hull structures. In practice, this is not a serious limitation as the potential savings are not as significant.
As-built documentation using laser scanning
Because of its low cost, ease of use and quality of the surveys, laser scanning can be used creatively for other purposes. An obvious use is as an inspection tool during the refit process; it provides a perfect way to accurately survey new work carried out at any particular time during the course of the project and, if necessary, to compare this with the 3D model. The location of new equipment mountings, penetrations, fixings, pipes and outfitting components can in this way be checked immediately after their construction, enabling any errors to be corrected quickly and avoiding costly delays later. In densely packed compartments, where items will be hidden behind panels or other equipment, successive laser scans during outfitting can provide useful as-built records. It is even possible to use such successive scans to create a layered 3D image of the installation. Scrolling back through these point clouds would create the impression of stripping back the equipment, revealing any items hidden behind.
Similarly, combining all the laser scans performed into one master set would provide the vessel owner with highly detailed and accurate »as built« documentation of the refitted area, which could save time and cost during any subsequent refits.
Summary
3D laser scanning, and the advanced software tools now available for exploiting the resulting highly accurate and detailed »as is« surveys, combine to offer significant business benefits, both to shipyards and ship owners, in vessel repair, refit and modification projects.
The surveying process is rapid, accurate and non-invasive and can be carried out in advance of delivering the ship to the repair yard. The early availability of such detailed and accurate 3D surveys, and the ability to reference this data within the 3D design system, enables design and fabrication work to be carried out with confidence, ready for the ship’s arrival. The refitting itself can then be performed quickly and efficiently, minimising costs and out-of-service time to the ship owner. The repair yard in turn benefits from reduced commercial risk and increased competitive advantage.
Andrew Gordon


