The first step for intelligent refits is a suitable geometric model of an existing ship. While with most surface design software geometry and topology can be transferred precisely, failure occurs when there is poor geometrical alignment, loose tolerances as well as a lack of »attention to detail«. In his winning entry at recent COMPIT conference, Marcus Bole presented a new solution
1. Introduction
Computer modelling of ships for design, analysis and fabrication is accepted without a second thought. The[ds_preview] growth of prototyping, simulation and analysis tools allow engineers to constantly review and change designs long before fabrication is considered and the ability to digitally store the information allows reuse for many years after creation. With work across different domains requiring the support of the same design data it is logical that this information should be shared between stakeholders to reduce effort in redefinition. However, as the task that each stakeholder performs on a project is governed by contractual obligations, time and skills available, data can be frequently regenerated, meeting the needs of individuals but not necessarily suitable for other stakeholders.
The lifecycle of hull surface and hull form data is particularly exposed to this situation. In early design phases, precise shape is not important because only volumetric information is required. But as a design progresses through performance analysis and on to fabrication the representation evolves to ensure the requirements of each stage are satisfied. With the growth of niche analysis tools the primary model, the surface, is often converted into other native representations which may use sections, meshes or other linearised elements suitable for a particular analysis. Later, once the ship is delivered the project is backed up. The surface may get reused in future projects but it has been historically rare for surfaces to be shared with stakeholders concerned with the through-life management of the ship, for example. Often hull forms have to be recreated from paper plans or surveys. With the life span of a vessel being typically 30 years, it is very easy for information describing hull shape to be mislaid and takes investment of time and money to recreate this information once it has been lost.
Software companies producing CAD systems have, in these regards, primarily focused on sharing information between different packages. File formats such as IGES and STEP are capable of accurately transferring a surface definition between two systems. However, if the quality of the definition is inadequate it has to be corrected or regenerated. This is often time consuming and requires an engineer with the skill and capability to use the surface modelling software available within the organisation. The introduction of tools which assist the correction or regeneration of surfaces from existing geometry could greatly enhance the sharing of data between different stakeholders even if they only able to make partial use of the transferred surface or the underlying geometrical representation. This paper discusses the reasons why surface definitions fail and suggests an approach for rapid regeneration.
2. The reality of working with hull surface definition
Computer software is the primary means of developing a hull form representation. Many of the techniques used today can be traced back to the 1970s and can be considered mature. The NURBS surface has become the standard mathematical representation because it is fairly straightforward to implement software to both manipulate surfaces and develop standards for exchanging this data between software systems. The use of control points rather than derivatives or obscure coefficients has made them very amenable across the whole of design and engineering. However, despite the ease in which these representations have found favour with shape designer, particularly for hull forms, discussion of techniques and tools are often polarised with users having strong preferences for particular software applications. Solid modelling is a further evolution in shape representation introducing far more capability and complexity, with a greater reliance on computer algorithms to solve design challenges. Hull shapes can be complex, particularly ship surfaces but not all designers are exposed to the same challenges or quality requirements. This gives them the flexibility to choose their own approach and software but creates a risk that the surface may, in the future, not be readily accessible in another system.
2.1 Assembling complex surfaces
While the control polygons of NURBS surfaces can be directly modified within CAD software, complex hull shapes often require the use of an assembly of surface patches to accurately represent specific boundaries shapes and the variety of distinctly shaped regions which may vary from highly curved to planar. It is impractical and unproductive to define these surfaces by using either a single surface or by directly manipulating the definition. Hull design tools aimed at ship forms often provide a design interface, methodology or solution to generate and manage the assembly of patches. This solution often represents the Design Intent of the user and although simpler than a complete surface definition it can support rich relationships and attributes which impose constraints upon geometry in the surface definition. This structure assists the user to create the surface by allowing them to create familiar shapes, quickly impose tangent conditions and manage rapid change without having to manually update large numbers of control points.
Cross sectional design is an approach using in many commercial hull design applications. It allows a user to build up a hull surface using a network of connected curves. Each implementation is unique to the software and is certainly considered to be the intellectual property of the vendor. Consequently, there are no common methods of transferring the Design Intent from one system to another which means that only the surface geometry can be transferred. Therefore, the capability to make rapid changes (beyond standard hull transformations) is lost and reuse limited when there is a need to make a specific change in another system. In these cases, if a designer does not have the facility to make the required changes the only recourse is to redefine the surface.
2.2 Combining surface definition and solid modelling
Solid modelling tools provide the designer with the ability to cut, join, and punch holes in the surface definition. This is achieved by embedding surface patches in a graph structure or Boundary Representation (B-Rep) defined by vertices, edges and faces. Patches can be restricted by trimming back the extents of surfaces giving the illusion of holes and solid connections with neighbouring patches. The use of solid modelling in concept and architectural design provides operations which can be used to reconfigure a design as part of an investigation into different options and can rapidly generate a model suitable for customer marketing. However, the use solid modelling tools can have a detrimental effect during production design because geometry that has been cut away may be required to support the fabrication process of individual parts prior to material cutting or to allow intersections between geometry to be re-established using production tolerances.
The quality of the geometry produced by these applications can be dependent on user configurable tolerances set in the software and the precision used in the design of the algorithms. While the original surfaces are primarily determined by mathematical equations, solid modellers rely on processes and numerical analysis where the quality of the output is dependent on how well the software was written. With solid modelling tools being designed for mechanical or product design it is challenging for them to support the kind of direct surface interactivity available in dedicated hull surface design applications. The embedding of surface geometry within a structure controlled entirely by the software prevents the designer from making further changes to shape and means that the designer is entirely reliant on the software implementation for all changes. When software fails to deliver, the user is left to resolve the modelling challenge based on their experience alone.
2.3 The human factor
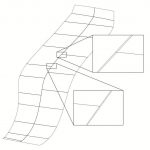
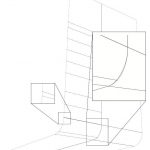
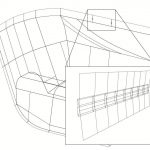
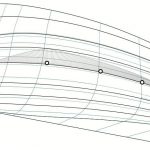
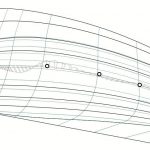
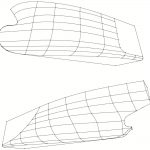
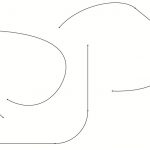
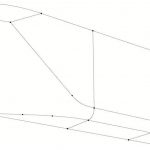
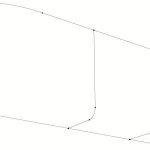
Tendering design phases are time pressured. Enough detail to provide proof of concept and no more is all that is required. If the tender is successful there is often an assumption that the concept hull form will be suitable for subsequent phases of the design process but this is not often the case. Hydrodynamic analysis and hull steel design tools are beginning to commit to using Solid Modelling libraries to drive the source definition and brings with it a need to ensure that the hull surface is error free in both geometric and topological terms, i.e. no gaps, inaccurate intersections or missing surfaces (Fig. 1). Although a production ready hull form is not a concept design deliverable, surfaces produced in the early stage often lack attention to detail. Small surfaces representing thin keels and stem bars strips can be left out of operations and disappear particularly when selection is done by mouse. Areas of the surface such as the bulb and waterline endings require a good degree of skill and experience to correctly introduce into the definition. Often it’s a matter of a specific configuration within the definition to produce a particular shape without which it can take hours of control point manipulation to generate, at best, an approximation. Defects can also result from poor understanding of the underling hull form definition techniques and surface mathematics. While it should not be a prerequisite for users to understand the mathematics, if users define scenarios which cannot be accurately generated there is often little remedial action that can be taken other than a complete redefinition.
2.4 When it all goes wrong
The reality of working with hull surfaces in modern software is that it is not unusual to be faced with a hull definition that is dysfunctional when imported into your preferred tool. Surface healing can rectify minor defects allowing a definition to be used within a software package but rarely do these techniques correct omissions or poor attention to detail.
Creating a precise hull surface is a challenge, as is the software development to support all the potential configurations a user may wish to represent. All too often the active software development stops when users can complete a native design definition because the business case has been achieved. But more often, users are importing and attempting use poor surface definitions. Sometimes it possible to accept poor performance but often the definition should be redefined. Tools which assist this process are rare and the user must revert to basic digitisation. This is an expensive decision requiring someone with skill and expertise. Therefore, the decision to redefine a hull surface is always one of last resort and is all too often associated with project delay.
3. The power of design definition
Design Intent is a recently defined phrase used to describe capabilities within a design tool which allow the designer to clearly and precisely define characteristics of an article. The term groups together approaches such rule-based design, constraints, associations, parametric relationships, topology and relational geometry which are each mature techniques in their own right and are found in many CAD, Surface and Solid Modelling design tools. Unlike individual techniques for controlling a geometrical definition the term should be seen more as a concept which highlights a relationship between the designer and the modelling system. It introduces an expectation that the designer will want to change the model and that the software can support those changes productively and without detriment to other geometric characteristics of the article.
The hull definition methodologies used to generate patch assemblies, such as Cross Sectional Design mentioned above, easily incorporate Design Intent and most implementations introduce at least some capability. These features greatly improve the productivity when defining a new hull surface. They can be just as useful when redefining a surface with the added advantage of referencing any original geometry that may be available from the failed definition. In this respect, Design Intent can assist users with limited skill or time to quickly replicate or repair a hull definition and avoid project delay. The additional step required is the ability to extract shape from reference geometry and generate design curves which represent Design Intent or respect the Design Intent captured in existing definition.
4. Creating cross sectional design definition from existing hull surface definition
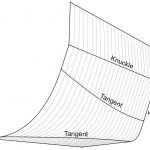
Cross sectional design is a technique for building up surfaces from a network of curves. The structure forms a B-Rep with vertices defined by curve intersections, edges by the curve segments between vertices and faces represented by local loop of edges. Surfaces are generated on the faces by extracting edge position and generating tangency by interpolating between adjacent edges. This process is managed by the software and the user will only see the resulting surface. The use of curves naturally lends the technique to hull surface definition given the traditional use of surface sections or contours to understand shape. Unlike the manipulation of NURBS Surface control polygons, the sequential creation of curves allows a gradual build-up of the definition creating a methodology where the user captures an outline shape and then adds more to refine shape where necessary. It is easy to add or remove an individual curve to understand sensitivity. Curve generation algorithms can be controlled by »constraint« type attributes associated with points or curves to create effects such as knuckles, blends or linear segments. Used across a curve network, these attributes support Design Intent and considerable reduce the amount of detail a user has to explicitly define.
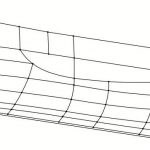
The definition of a hull surface using Cross Sectional Design follows a surprising consistent approach (Fig. 3). It starts with the definition of surface boundary curves such as the stem, stern, deck keel, transom and often midship section, followed by curves which represent features such flat of side or bottom, knuckles and other discontinuities. This initial network of curves characterises the arrangement of shape in the hull surface and are common throughout hull forms of a certain type. Prior knowledge of these configurations, termed Form Topology, Bole (2010), can be used to assist the user develop the definition by automatically applying constraints and are another manifestation of Design Intent. The final stage of definition is to refine the shape by adding more curves. This is often the time consuming part during the creation of a new surface requiring time to find a smooth shape, but if the shape can be systematically extracted from the original geometry, all the user needs to do is verify the accuracy and quality of the generated definition.
As curves used in cross sectional design are often planar, definition can be simple generated by sampling the original geometry by a planar intersection and using least-squares techniques to generate the design curve definition. Furthermore, the least-squares fit must be sensitive to any Design Intent the intersection encounters on existing design definition.
5. Commonly encounter hull definition scenarios
Generating design curves by performing a planar intersection and applying a least-squares fit to the sampled points is simple process and may be applied to any CAD geometry. Thus this curve generation technique is not limited to working with surfaces.
5.1 General curves
Although surfaces are today’s most popular hull surface representation for design, curve representations remain just as popular for many other applications. It is easy to generate curves from surface definitions and it is a convenient format for many niche analysis tools that do not require a continuous 3D representation. Curve data can be found in many 2D plans such as Lines Plans and General Arrangements. Data representing older vessels is still held as tables of offsets and it is often necessary to generate a surface from this data if through-life analysis in modern tools is required. Using common CAD formats, such as DXF and IGES, curves can be easily loaded into CAD software as polylines or NURBS curves. Curve data can also be extracted from digital documents such as PDFs which creates the possibility of accurately replicating designs from competitors’ poorly secured brochures or websites in the public domain. Paper plans can be scanned and the images traced within the hull design tool or they can be converted into vector formats and used directly. Curve data is so ubiquitous that, given a little technical knowledge, it is easy to utilise the information. Algorithms and techniques which generate points resulting from intersection with planes are well documented and these points may be used directly in a least-squares fit algorithm.
5.2 Cross sectional design curves
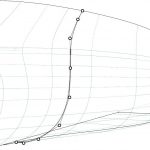
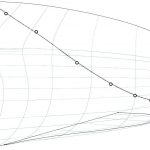
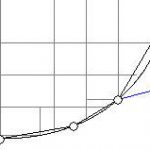
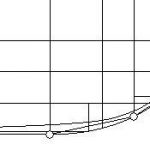
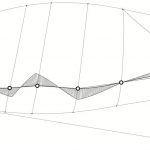
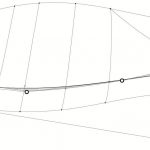
Although the technique is no different to that described for general curves the ability to generate additional design curves from the existing Cross Section Design definition is a powerful tool particularly if you look to exploit the flexibility provided by least-squares fit over the more obvious cubic spline fit. Cubic Spline fitting can be restrictive because the number of control points on the generated curve is directly related to the number of points sampled (Fig. 4a). This factor is quite important when taking into account the ability to create Design Intent such as the Relational Geometry Bead configuration (Letcher et al. 1995), where the control points of one curve (child) are embedded in the geometry of other (parents). This configuration is extremely useful when building a curve network allowing the shape of child curves to automatically adapt to changes in the definition of individual parent curves. However, as the number of curves increases, child curves often intersect too many curves and the resulting shape due to the cubic spline fit is far more sensitive to the relative position of parent curves. These scenarios are hard to fair. Removing the relationship between curves and reducing the number of control points is the only way to proceed but these actions break the curve network. Moreover, user interface solutions for rapid curve generation often involve interactively adding curves that will automatically become the child of all others they intersect. While this is often seen as a good productivity enhancement without careful use it can make achieving a good quality hull surface more difficult.
Least-squares fit offers an alternative approach for curve generation. The technique wouldn’t normally be considered because it doesn’t general intersect the analysed data points, but in terms of the connectivity hierarchy within the curve network this makes it ideal for creating ‘parent’ curves to which the sampled ‘children’ can be attached. The number of control points can be specified and, therefore, across a family of definition curves can be kept consistent creating desirable curvature properties across a surface. The addition of a smoothing model as part of the fit allows the curvature quality to be controlled and allows the number of control points to be more than the number of sample points, i.e. when the least-squares fit becomes under defined.
5.3 Surface assemblies and boundary representations
When a surface definition fails to properly import from one software system into another it can cause significant disruption to the project. Often the individual reasons why the surface will not import are small within the overall size of the geometry. Poor alignment between surface patches, greater reliance on Solid Modelling tools with the tolerances being very small and inconsistent between systems there is always a chance of non-acceptance. The other reason that the surface may have to be redefined is that it is not suitable for the next design stage and the original design definition is unavailable, i.e. the Design Intent has been lost. In most cases the geometric shape of surface definition is entirely satisfactory and this fact is often the cause of user frustration when an imported surface doesn’t work. In some cases a solution can be to import the raw geometry ignoring the Solid Modelling data but mainstream software rarely supports this.
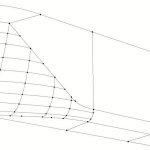
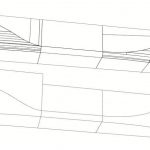
With a focus on regenerating a hull definition that captures Design Intent as well as the correct shape, definition curves may be generated from surface geometry by a number of methods. An advantage of hull surfaces based on multiple patches is that the edges will pick out the features of the surface that should be defined before attempting to capture general shape of the surface (Fig. 5). These features will often be associated with a particular condition in the surface such as a knuckle or constraint on tangency. Often it’s possible to assign an equivalent constraint to the design curve, capturing the Design Intent. These feature curves may be generated by extracting the edges of patches as individual curves, welding them together to form a single curve if necessary and then fitting a Design curve using a least-squares fit to control the number of control points and quality of fit.
Once the initial network of curves representing Form Topology have been defined, the remaining definition curves may extracted by taking planer intersection through the surface, i.e. generating a contour, and again fitting design curve using least-squares. Compared with the time required to manually digitise control points this may take a matter of minutes if the software automates the surface intersection-curve generation process. Equally this approach may be applied to any other surface geometry such as facets.
5.4 Point clouds generated by laser scanning
A variety of methods now exist which sample the shape of real objects. Techniques such as Laser Scanning can optically capture the shape of a hull in a cloud of points. This allows the rapid survey of existing vessels for though-life management where no hull definition exists or where it validity is questionable. The biggest challenge when working with point clouds is the amount of data produced and often the solution is more about optimising the computer resources to allow the user to work with the data rather than the actual fitting process. Scanned data often consists of multi-gigabyte files which are impractical to load into computer memory in entirety and some older operating systems are limited on file size. The software needs to provide visualisation of the data so that the user can access the geometry by down sampling and volume cropping. Transformation tools are required as the data is unlike to be positioned or orientated in the correctly.
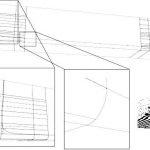
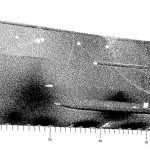
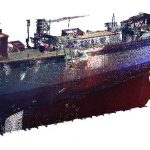
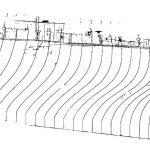
Methods exist for converting point clouds into faceted geometry or trimmed surfaces. Neither of these representations can be productively modified once generated, if that is a requirement, because the geometry will be defined by a large numbers of control points. The scanner captures everything within the line-of-sight of the sensor positions but is unable to capture areas where it’s not practical to position the sensor. This means that a scan of a dry docked vessel will capture mooring lines, anchor chains, rigging, ladders and hull supports but there will be often be little data of the keel (Fig. 6).
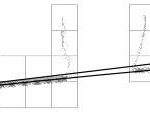
It is possible to remove unwanted areas by removing points but this can be time consuming. Alternatively, the cloud can be cut with a planar section (Fig. 7), collecting points from which a design curve may be generated. The planar section may be placed to avoid undesirable clusters of points and it is possible to develop methods which can avoid undesirable data points which are not part of the hull surface.
6. Developing a least-squares method for fitting design curves which respects design intent
Using least-squares fitting to generate design curves is applicable across all hull design actives although it’s most useful when hull definition geometry already exists. Presenting it in the simplest format inside design software ensures the best possible utilisation. The process to fit a curve consists of three stages: intersection, sort and fit. The definition of an intersection plane is primarily a user interface activity and is discussed below. Point sorting is more challenging because depending on the configuration of points no one technique is always completely successful. In my implementation, a local nearest neighbour approach was chosen balancing speed against the quality of results. The algorithm identifies a bounding box (2D) around the intersected points, selects a point closest to a corner or edge and then iteratively searches for the nearest neighbour. The purpose of selecting a point closes to a corner or edge is to instigate the sort on the basis that the end of section, waterline or buttock curve will normally terminate in these locations. Following the sort, spans between design curves are identified by searching for intersection points from design curves with tangent conditions. The Least squares fit is then applied per span, accounting for tangent constraints at span ends.
6.1 Least-squares fitting
The least-squares fit method is rarely see in CAD software as a modelling tool but it has a lot of useful properties which may be used to enhance the generation of design definition beyond that which can be achieved with Cubic Spline fitting or manual definition. The least-squares method has proved popular in the past when used for curve fairing but again this has waned with the rise of surface definitions. In respect of curve generation, least-squares is a method which given a mathematical model, identifies the best set of parameters (the least square of errors) which fit the model to sample data. Least-square fitting of B-Spline curves is well documented (Piegl and Tiller, 1999) (Farin, 2002), and produces curves that can coexist with Cubic Spline fitted and manually defined B-Splines without any special treatment.
The geometry being sampled to produce new design curves may not always be smooth. Coarse data sources like hull sections can have a lot of undulations depending on the frequency of the sections and how the data was captured. Interactive smoothing can be added to least-squares as an additional set of equations. Farin (2002) presents a simple model which minimises the second differences between control points. It is also possible achieve this by minimising derivatives quantities, such as curvature or energy. However, it should be noted that these measures are expressed as signed scalar quantities when fitting in 2D but become vector quantities in the 3D case increasing complexity significantly.
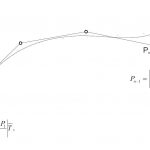
The fitting algorithm becomes more complicated when applying end conditions resulting from connections to parent Design curves that have tangent constraints. These constraints control the direction of the tangent vector but not the magnitude. For cubic B-Splines, the tangent magnitude, in terms of the length of the control polygon segment between end and adjacent points is conventionally taken as one third the distance between the end and second points (Fig. 8). This constraint couples all three coordinates together preventing the general case of solving in x, y and z separately. This produces larger matrices and requires the use of a non-linear solver due to the use of Pythagoras theorem to calculate distances between points. Lagrange Multipliers may be used to introduce these constraints although it is possible achieve the same result by applying the least-squares fit on unconstrained points and updating the magnitude of tangents after each solver iteration until convergence.
6.2 Fitting curves to point cloud datasets
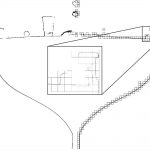
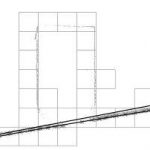
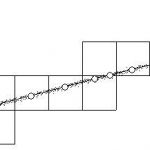
Applying the least-squares fit to a slice through a cloud point dataset introduces challenges in regards to the size of the data involved. A slice through the dataset may gather many thousands of points introducing the requirement to process large matrices and may capture areas of the point cloud that are not relevant to the area of interest. Considering that the maximum useful number of points on a generated design curve should not really exceed twelve before manual fairing becomes challenging, an individual point in a slice can be considered insignificant. Both the point cloud and planar slice are spatially optimised by mapping points into a 3D or 2D grid respectively (Fig. 9a). The 2D grid used in a planar slice remains sufficiently dense that sampling a data point from each cell still produces points numbering in the hundreds but this is now acceptable in regards to the amount of time required to calculate a fitted curve. A point from each cell is selected by calculating the average centre, C, of all cloud points in a single cell, and then the average centre of all points within a rectangle centred on C (Fig. 9b).
Slicing a point cloud dataset will collect points that aren’t relevant to area of interest and an automatic method is required to exclude these in the curve fit. When fitting to the point cloud, the initial network of design curves should at least exist representing the Form Topology (Fig. 5). As most curves within this network will have some tangent condition, the spans between each of these curves will need to be fitted separately. For each span, points can be collected from the slice by determining the shortest route defined by the graph of populated cells, selecting the cells intersected by the existing design curves at the start and end of each span at the route termination points. This has a number of advantages. It ignores points that would cause the fitted curve to diverge from the general trend of the data (Fig 9c), allows gaps in point clouds cause by obstructions to be connected (Fig 9d), and orders the points ready for the least squares fit.
7. User interface requirements to support regeneration of hull surface definition
User interface design is a very subjective topic and various approaches to crafting a hull design solution are on offer in the many applications available. In my experience from developing PolyCAD (www.polycad.co.uk), the following specific features are considered to be important in software used to design and redefine hull surfaces.
The challenge when capturing hull surface shape is to be able to understand, represent and manage the definition within the constraints of the conventional 2D interfaces of the screen and mouse, and the keyboard. These tools must be used to project information into the software generating a 3D model. It is inadequate to constrain user to numerical entry and 2D manipulation in principle planes alone. The software needs to take maximum advantage of any routines which can be used to derive 3D coordinates. Point snapping is one of the most significant productivity features which allow the user to place new definition on existing geometry such points, curve and surface edges. Couple this with the ability to rapidly establish a working plane »on the fly« that allows the user to work in principle planes or those represented in model definition. Projecting the ray defined by the mouse cursor into the model so that it intersects with the working plane defines a 3D coordinate and allows the user to work in oblique and perspective views without having to account for screen depth. Refinements such as making it easy and interactive to insert points and providing common functions which are context sensitive reduce the amount of physical mouse movement across the screen (Fig. 12).
7.1 Interactive Curve Fitting
Creating a successful user interface to support the rapid generation of fitted curves in the process of hull design is surprisingly challenging. The software may allow rapid generation of fitted definition curves but the result of making this activity quick and easy, as mention in the case of Cubic Spline fitting in 5.2, was that the user did not consider reviewing the quality of the curves and definition. Consequently, without pause for review, the software allows the user to generate potentially poor quality definition very quickly and it may not be until later that the user may realise something is wrong and it often takes experience to understand when this happened. Unlike the cubic spline fit, a least-squares fit exposes parameters controlling the number of control points and smoothing. The need to review these parameters provides an opportunity to pause and check the curvature quality and closeness of fit. The option of reselecting the intersection plane can be provided. Collection of cloud point data takes time and requires selection of the data source and specification of the intersection parameters (grid size, slice thickness) which provide a further opportunity to review the shape of the curve.
Definition of an intersection plane can be very easy. For example, a principle plane can be defined with a single mouse click in combination with a snap point. However, principle planes are not always the best choice and certainly there is a need to define 2D curves in keeping with »diagonals« which are 2D curves approximately parallel to heeled waterlines. However, extensions can only be made by supporting plane definitions that are supported by constraint configurations available in the design curves. In PolyCAD, additional numerical parameters required to defining curve location planes were are avoided to maintain flexibility. Location planes are defined by through control points on the curve respect to a particular plane orientation. Principle plane constraints are defined by a single selected control point and inclined planes, where a principle axis lines in the plane, is defined by two selected points. By first selecting one of six possible plane orientations (three principle and three inclined plane definitions), the user can then define the location plane by snapping the requested number of points.
Point snapping provides a quick method of determining a 3D coordinate within the model but also provides advantages. If a selection is made near to a design curve, the fitted design curve can reference it directly as a Bead. Subsequent clicks can be used to localise the fitted curve to a number of spans within the initial curve network in addition to supporting the definition of inclined planes (Fig. 10).
8. Worked examples
8.1 Regenerating a hull surface which has a poor definition and curvature quality
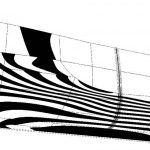
This Capesize Tanker hull form was originally created for stability analysis but was also used for model tests (Fig. 11). Defects include the forward flat of side curve undulating across other patch boundaries and there is a gap in the bilge radius between the entrance and midbody regions. Furthermore, there are a large number of high aspect rectangular patches which make direct fairing of the patches challenging.
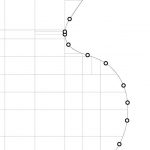
In the first stage, the outer boundary of the surface is captured often starting with the stem and stern profiles. It is difficult to use least-squares fitting to capture these shapes, particularly bulbs, because of the different knuckles, straight and curved segments that are present. It is far easier to directly digitise these shapes using the mouse, snapping to the surface geometry and apply curve constraints where necessary (Fig. 12).
Others with more continuous curvature may be captured by extracting the edge curves of surface patches, combining into a single curve if necessary, and then fitting a design curve using least-squares. Analysis features such as curvature and divergence from the sampled data assist the user select the number of control points and level of smoothing. At this stage the user begins to choose the number of control points that will be used to define the family of design curves which will capture the initial shape of the surface.
The first stage completes when the characteristic shapes of the surface have been captured in the network of curves defining the Form Topology as seen earlier in Fig. 5. Constraints on these curves such as tangents and knuckles on these curves will shape any child curves which reference them eliminating a need for the user to explicitly capture these shapes.
Once the curve network has captured the boundaries and characteristic features, shape curves can be added. Least-squares curve generation is used to capture the shape of the surface spanning the initial curve network. All the user has to do is select the position of the intersection plane using a digitised snap point for a principle plane or two points for an inclined plane aligned a principle axis. The software automatically extracts data points for the least squares from any intersected geometry and generates a preview of the resulting design curve. The user can now review the curvature and accuracy of fit, interactively changing the number of control points and smoothing until satisfied. This approach eliminates the need for the user to manually select and position points and because it’s quick minimal time is lost if the curve needs to be position now or later the definition process.
Once the longitudinal shape has been captured using design curves, the definition required in the patch network can be completed using cubic spline fitted design curves. The user generates these in exactly the same way as the previous curves but the method is usual set to consider intersections from design curves only (Fig. 15).
The quality of the surface generated isn’t perfect but for the time taken and the quality of the referenced surface it is much improved and satisfies the accuracy required for import into solid modelling software. In this particular example, surface quality can improved by introducing the correct definition required to control the ‘end surface’ above the bulb and around the propeller shaft. Detailed fairing around the flat of side curves will improve shape there.
8.2 Generating a hull definition from a Laser Scan
As far as the user is concerned the process for generating a hull definition from laser scan information follows the same process. However, the quantity of reference data is significant and the challenge is for the software to provide access to that data without a decrease in performance. Prior to capturing geometry, the data needs to be positioned and orientated correctly and any unwanted areas of points removed. Physical changes to the laser scan dataset can take time and these can be avoided by apply geometric transformations as points are retrieved from file and minimising the number of times the data is optimised into a spatial map or grid.
Although helpful for visualisation and orientation, it is difficult to use the dataset directly to digitise. It is difficult to give the point cloud an impression of being in 3D particularly when being displayed on a 2D screen and certainly when there is no colour. Often it is easier to appreciate shape when there are less rather than more points displayed.
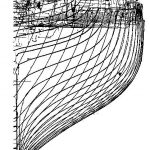
Capturing thin sections of points several millimetres thick turns the data, as far as a hull designer is concerned, into something that can be related to more strongly (Fig. 16). Furthermore, as each slice will hold only 10.000–100.000 points it now practical to introduce snapping capability although spatial optimisation of the slice data structure is still required.
As before, the first step is to capture the boundaries and characteristic features (Fig. 17). Slices can be positioned to pick up features such as the centreline but often it’s necessary to resort to manual
digitisation because these specific features are often fuzzy in point cloud. Features such as deck lines may be obscured by deck structure, capping, rubbing strakes or gear, knuckles can have dents and flat of side curves are sensitive to plate distortions. Therefore, it’s necessary for the user to provide some judgment.
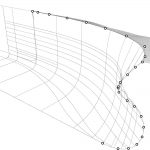
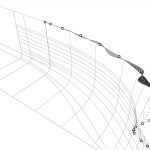
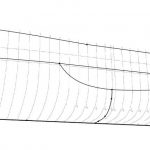
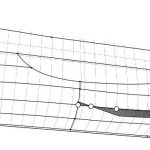
Once the major characteristics have been captured, least-squares fitting can be used to generate longitudinal design curves in the shaped areas of the hull form (Fig. 18). Using the intersection plane, a temporary slice can be generated through the point cloud and sample points extracted to support the fit. Intersection planes can be placed between undesirable hull surface features captured in the point cloud. In Fig. 18, the planes are selected to avoid bilge keel, propeller, shaft and rudder. These features may be added as auxiliary surfaces later. Once the shaped curves are generated, the definition required for the patch network can be completed by adding crossing section curves based on cubic spline fitted B-splines (Fig. 19).
Although not perfect, the curvature quality of the surface produced in this example is more than acceptable considering time spent on the definition. Often it is challenging to understand the shape of small features in point clouds such as stem bars and keel flat and how the shape of these should transition into the surface that surrounds them. Sometimes the user just has to make a best guess. Later a final decision needs to be made in regards to a point to stop. It is easy to continue improving the definition but if this is beyond what is suggested by the source data this may not be beneficial.
9. Concluding summary
Translating hull surface definitions between CAD, production and analysis software is not always successful. The wider use of Solid Modelling tools increases the required quality expected in hull surface definitions and the risk of failure when a surface definition falls below this. Although these failures are often seen as a software problem, more often than not, surfaces fail due to poor use of these tools resulting in gaps, poor alignment and bad definition within the surface. Furthermore, early in the design process it is often easy to make shortcuts in the creation of a surface which must be accurately resolved before it can be used for production.
Least-squares fitting provides a starting point for algorithms which can be used to generate definition where the user can review and change their mind in regards to the complexity of new definition, the quality of curvature and how closely it matches the surface. With good software design these algorithms can be provided to the user allowing them to rapidly generate definition with one or two mouse clicks. As the approach is based on the simple intersection of other geometrical elements it is applicable almost any geometrical entity including laser scans and the hull surface design definition itself.
Acknowledgements
I thank Christian Stark for allowing use
of the laser scan of Zodiac (www.schooner
zodiac.com) as well as Hans Karel Stam from SMB Naval Architects & Consultants (www.smb-naval-architects.nl) for use of the Tornado dataset.
Marcus Bole


